| Creating an account |
Sign Up: First things first - create an account. It is fast and easy ... More...
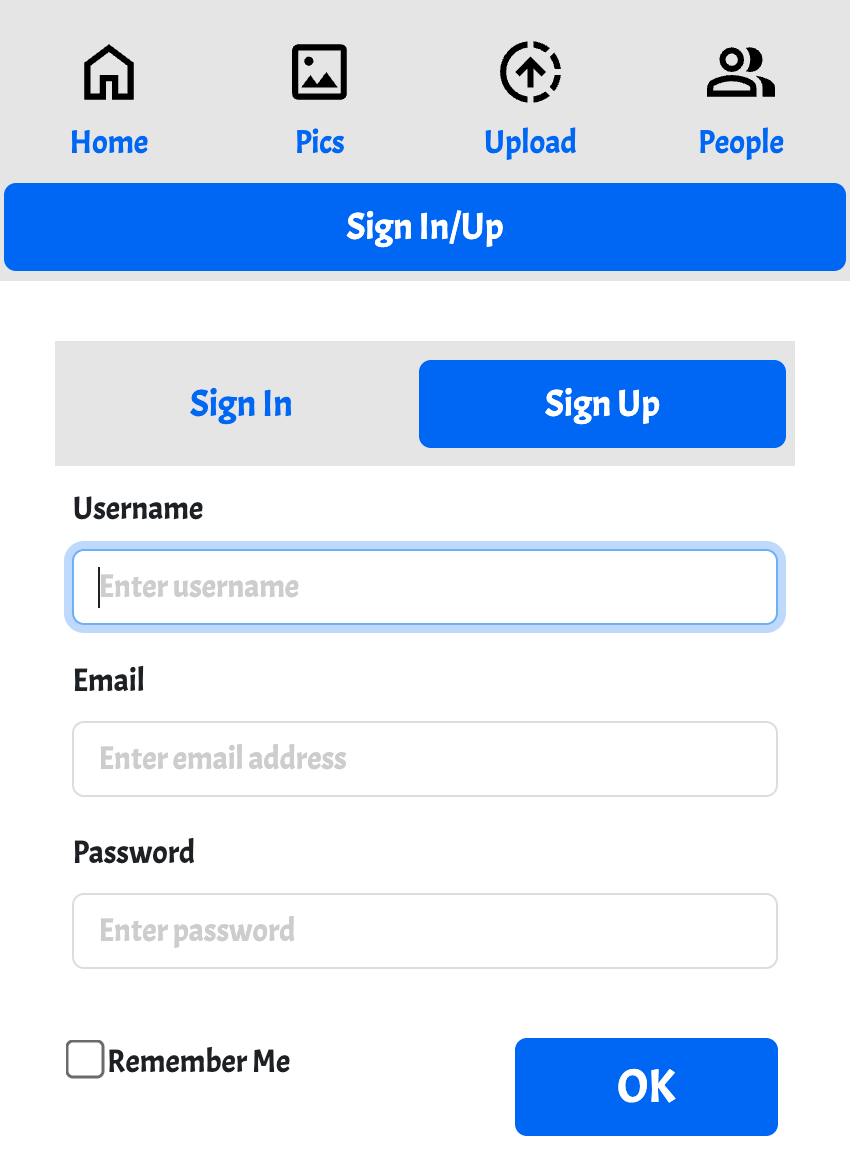
- Start by selecting "Sign In/Up" on the top of your screen.
- Select "Sign Up"
- Add your username, email address, and password
- Select "OK" - all done
- Sign In - once your account is created you can sign in using your email and password. The sign in options also allow you to reset your password.
- TIP: Use "remmber me" to avoid being asked for your credentials all the time
- TIP:If you're using an iPhone you can easily make an "App Icon" by sharing the site via "Share Icon->Add to home screen". Doing this provides you with a nice OurFamilyCircle icon right on your iPhone screen for quick access to your family circle.
Once you've created an account the "Sign In/Up" is replaced with your username. Clicking on your username will show your profile.
Profile: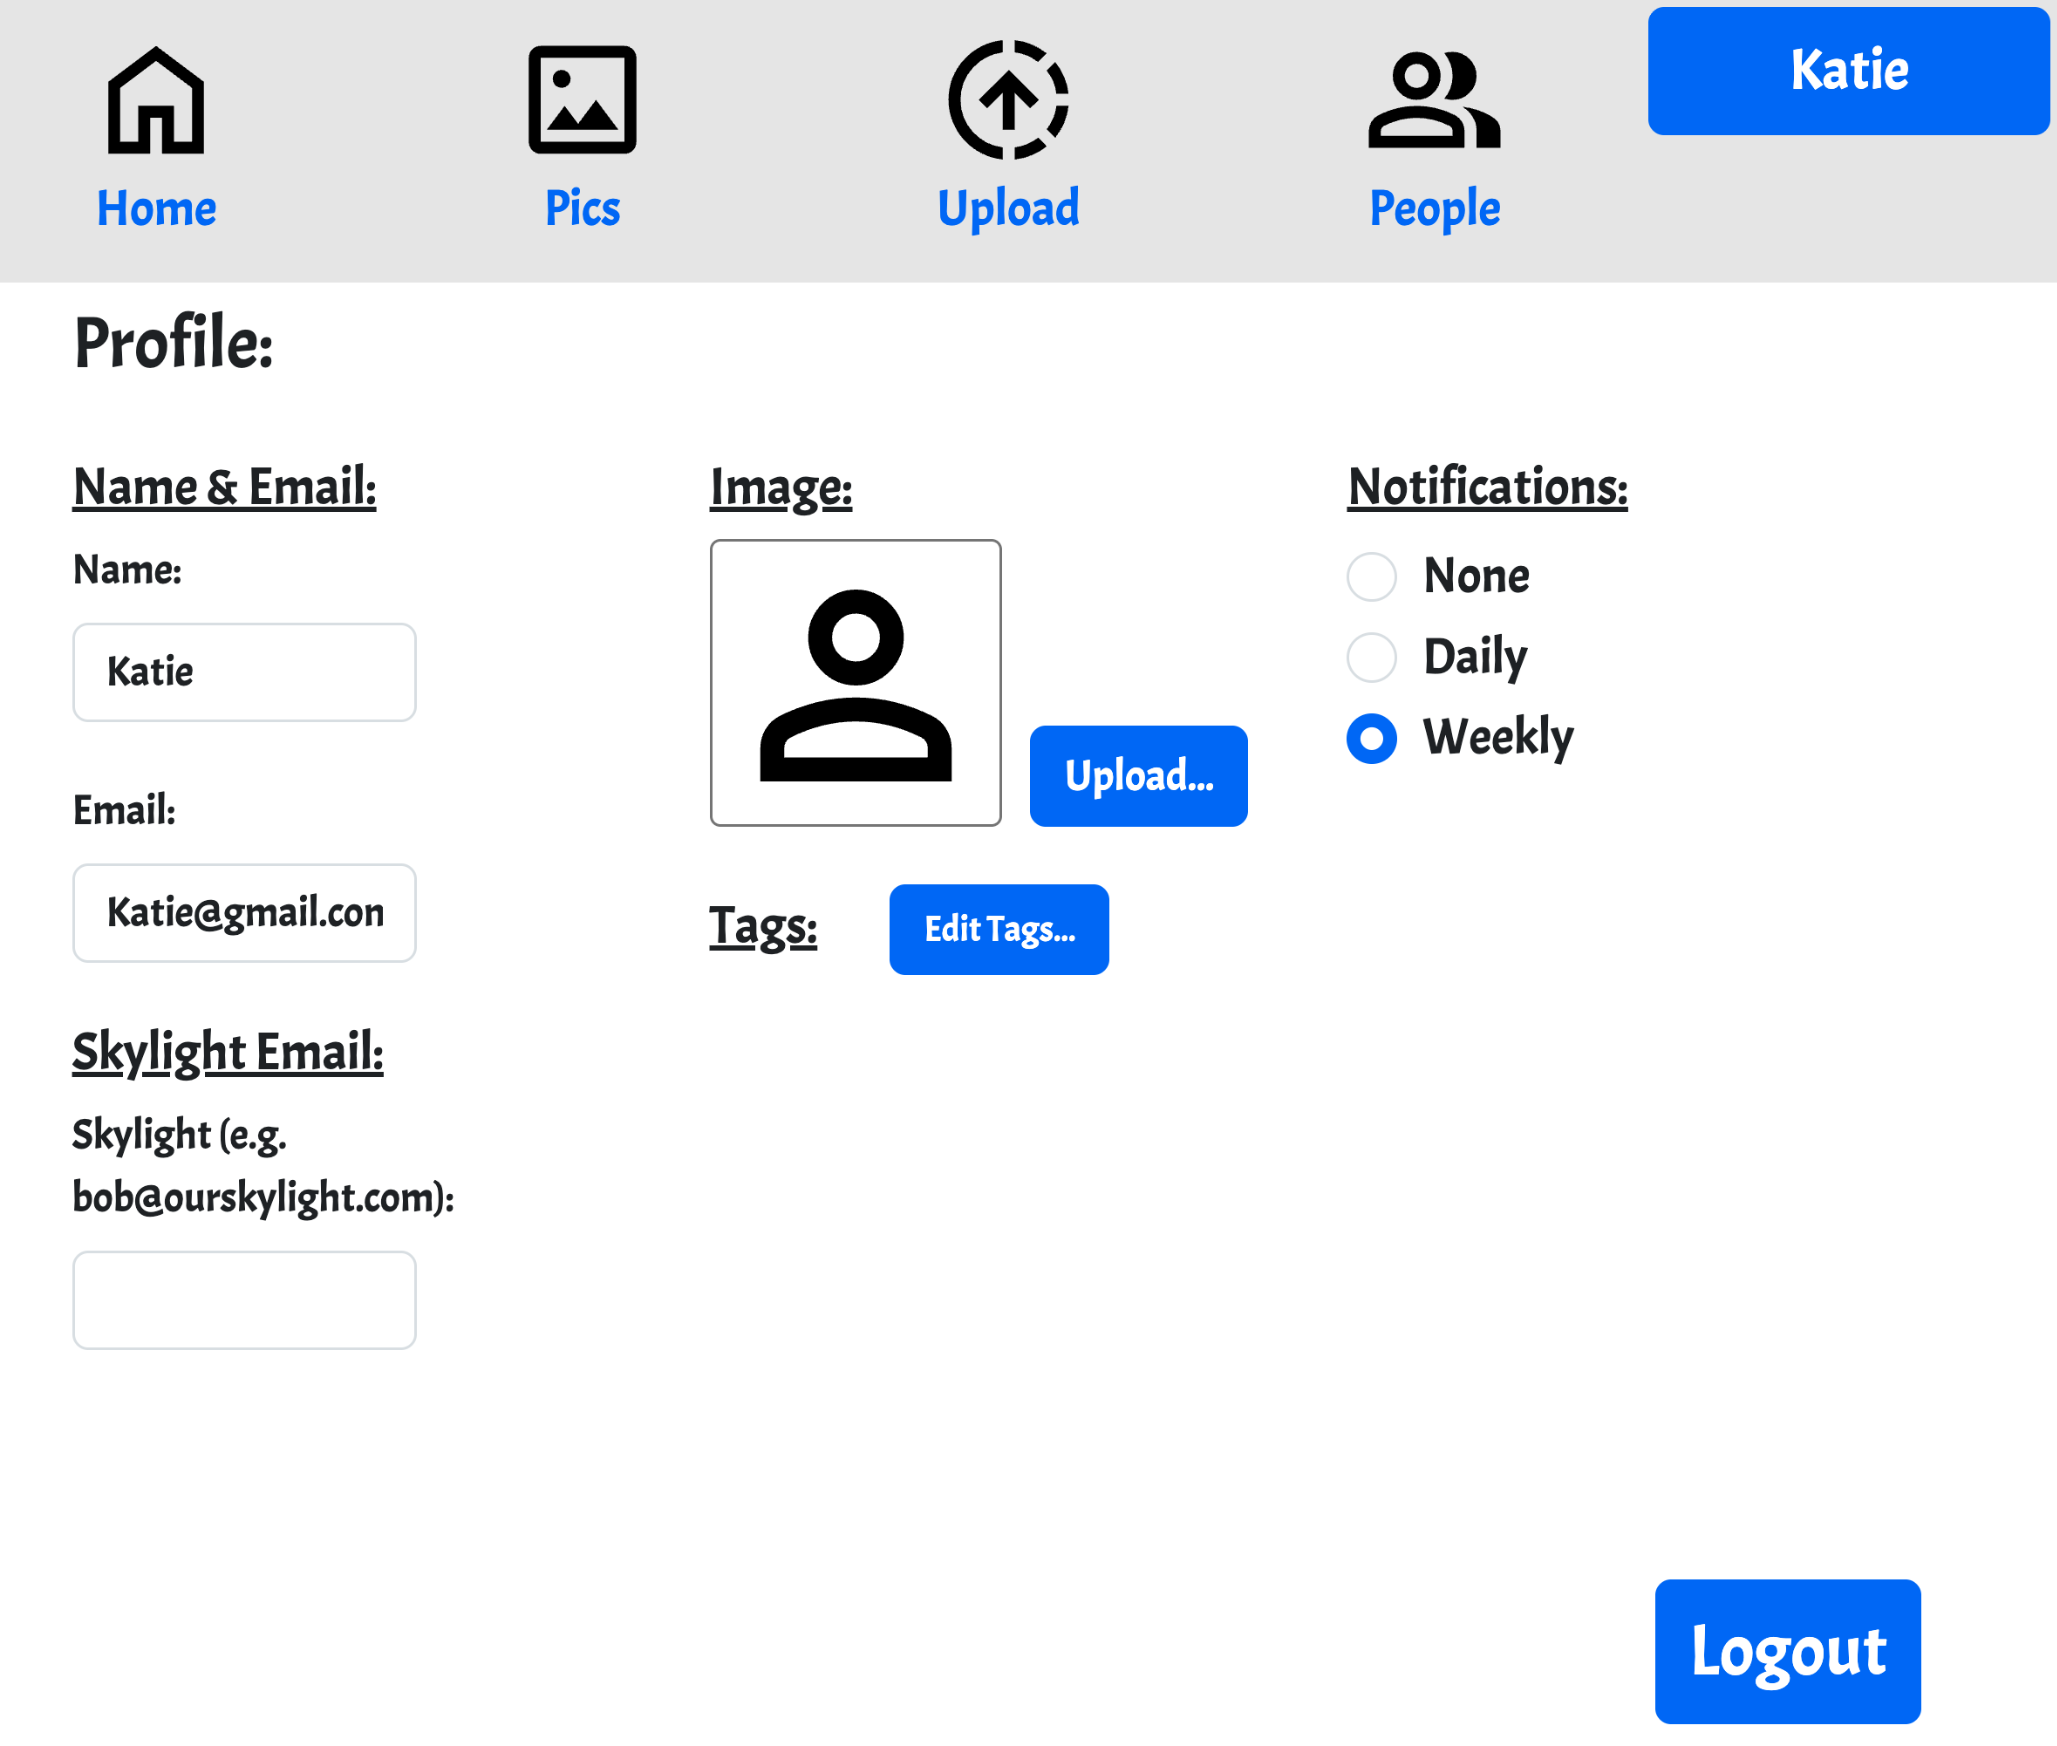 Your profile provides you with the following:
- Change your name or your email
- Change your image (used for your photos/videos and comments)
- Change your notification prefernece (emails sent to provide you reports on your people's activites).
- Edit your tags - tags provide a way to identify aspects of photos and videos (e.g. people, places, things). These tags are only available to your account and can be used to filter your views (more on that later)
- Add Skylight Email - Skylight is a frame that nicely presents your photos. Each skylight device has an account email and if you choose to enter this email then OurFamilyCircle allows you to easily send photos to your Skylight device. More on this later when discussing views.
- Logout - lastly, when you're ready for the next adventure logout by clicking this button on the bottom
|
| Connecting to friends and family (your "Circle") |
Connecting to "your people" is where your sharing control begins ... More...
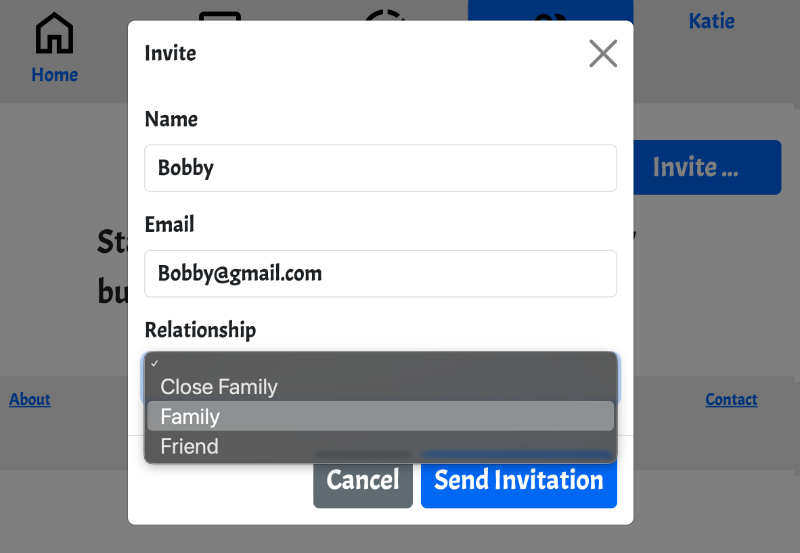
- Connecting to your people is done by "inviting" them. To invite someone click on "People" (on the top) and then choose the "Invite..." button.
- When inviting you may choose a name/nick name for them, an email address, and a relationship. The relationship choices are "Close Family", "Family", "Friend", or you may leave this blank.
Later, when you share a photo or video you can choose to share it based on these relationships. In other words, you can share media with just your close family, just your family, just your friends, all your people, or with multiple groups (e.g. Close Family and Family but not Friends).
- Choose "Send Invitation" to create the account for them and send them an email invitation to OurFamilyCircle.com. In that invitation is a link for them to complete their account creation and being connecting to you.
- Once your invitation email is received and your invitation link is clicked your family member (or friend) sets their password and you are then connected.
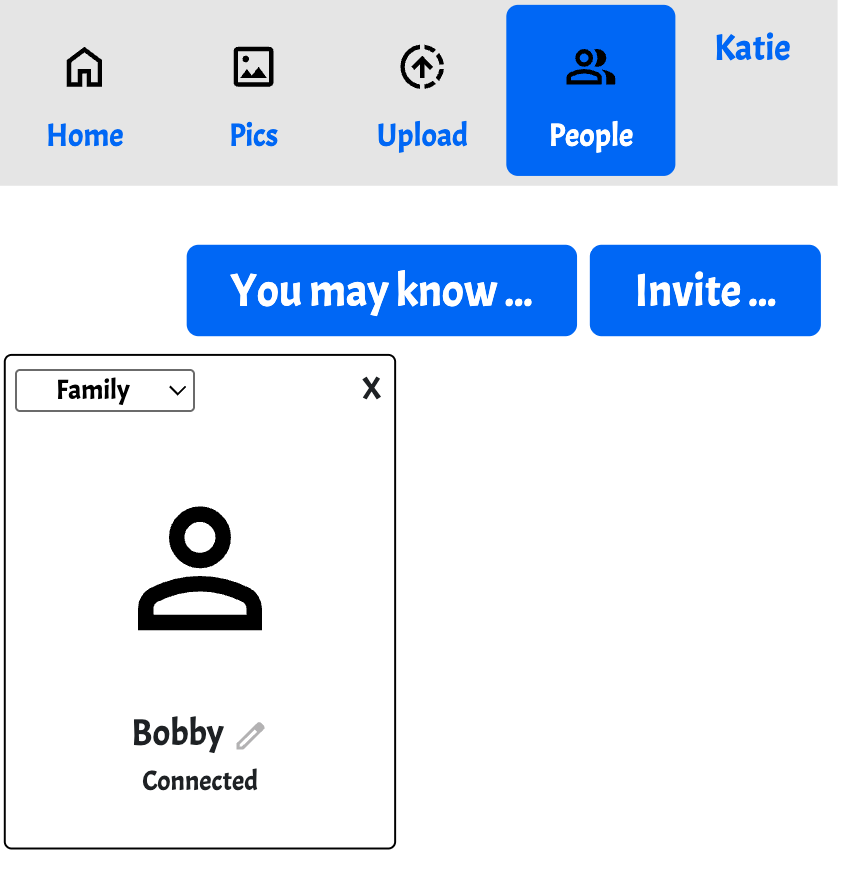
- The People tab will indicate this connection as shown.
- At any time you may change the relationship via the menu on the left.
- At any time you may remove them via the "X" on the upper right corner.
- At any time you may change their nickname by clicking the pencil icon next to their name. This is useful for relationships as "Bobby" may be "Bobby" to you but "Uncle Bob", or "Grandpa" to someone else.
- When someone has invited you to join their circle then they will be present on this tab and will have 2 buttons - one for "Accept" and one for "Reject" available. When you're ready make a choice - no rush.
- When you request someone to join your circle and they haven't responded yet there will be an "Awaiting Response" indication for them. If you wish to re-send the invitation then click that "Awaiting Response" link.
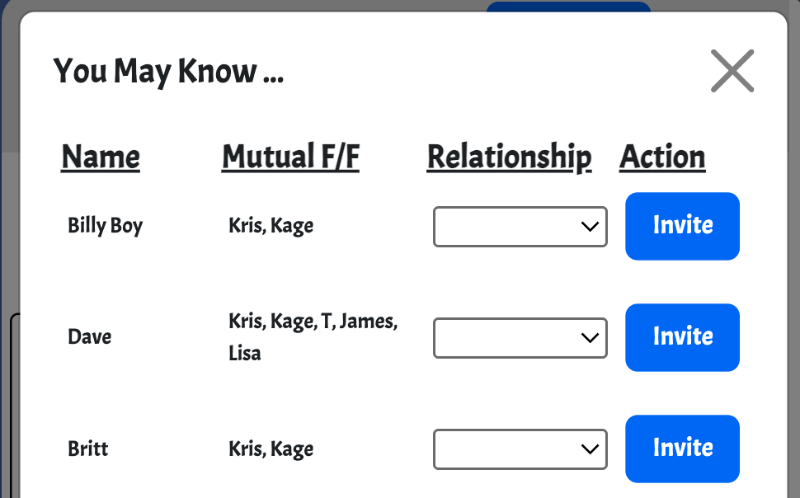
- You may also click "You May Know" within the People tab. This provides you with a list of your "People's people" that you may invite to join your circle.
|
| Uploading photos and videos |
Uploading media is straightforward and continues the sharing control ... More...
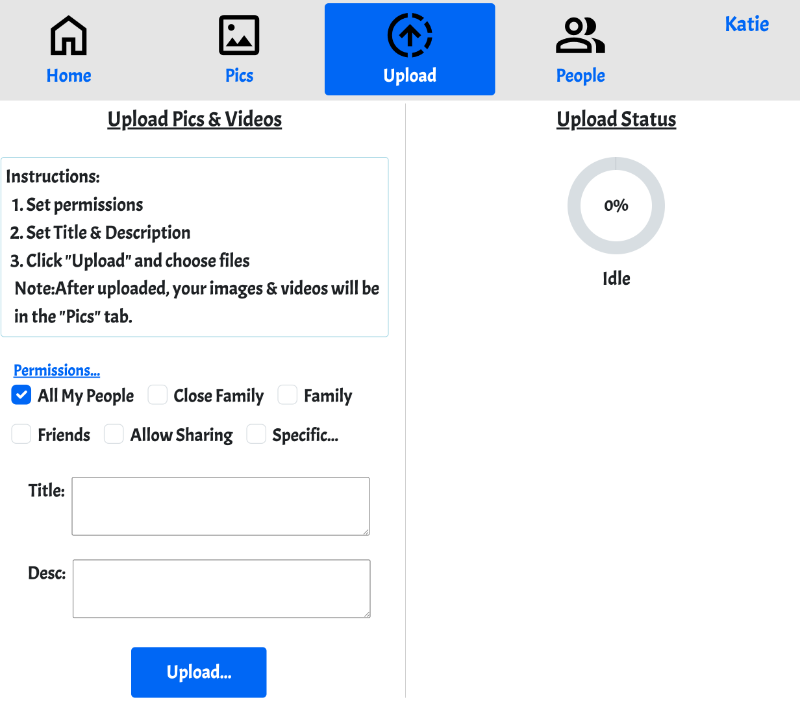
- Choose the "Upload" tab on the top"
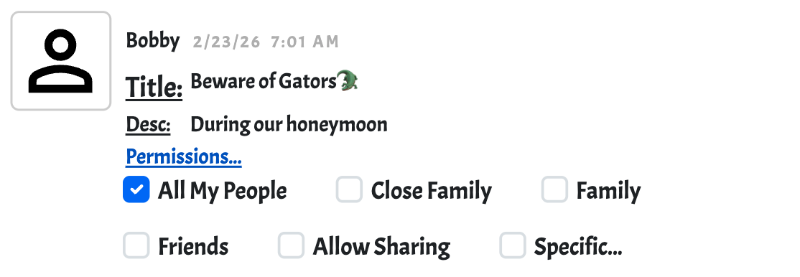
- Set the permissions you'd like by choosing the checkboxes associated with the groups shown (Close Family, Family...). For finer control you may choose specific individuals via the "Specific..." checkbox. While you may change those permissions later this sets the initial control for the media about to be shared.
- IMPORTANT: The people you don't give permission to view a photo have no ability to view that photo. Also, people outside your circle have no ability to view that photo.
- Alternately add a title and a description. Note: Your operating system likely allows emoji icons to be inserted to these fields.
- Choose the "Upload" button and then you may choose one or more photos & videos. The upload beings immediately and when complete will show in the "Pics" tab
- Note: there is a limit of 50 uploads per month
|
| Viewing photos and videos & controlling permissions |
There are multiple ways to view media ... More...
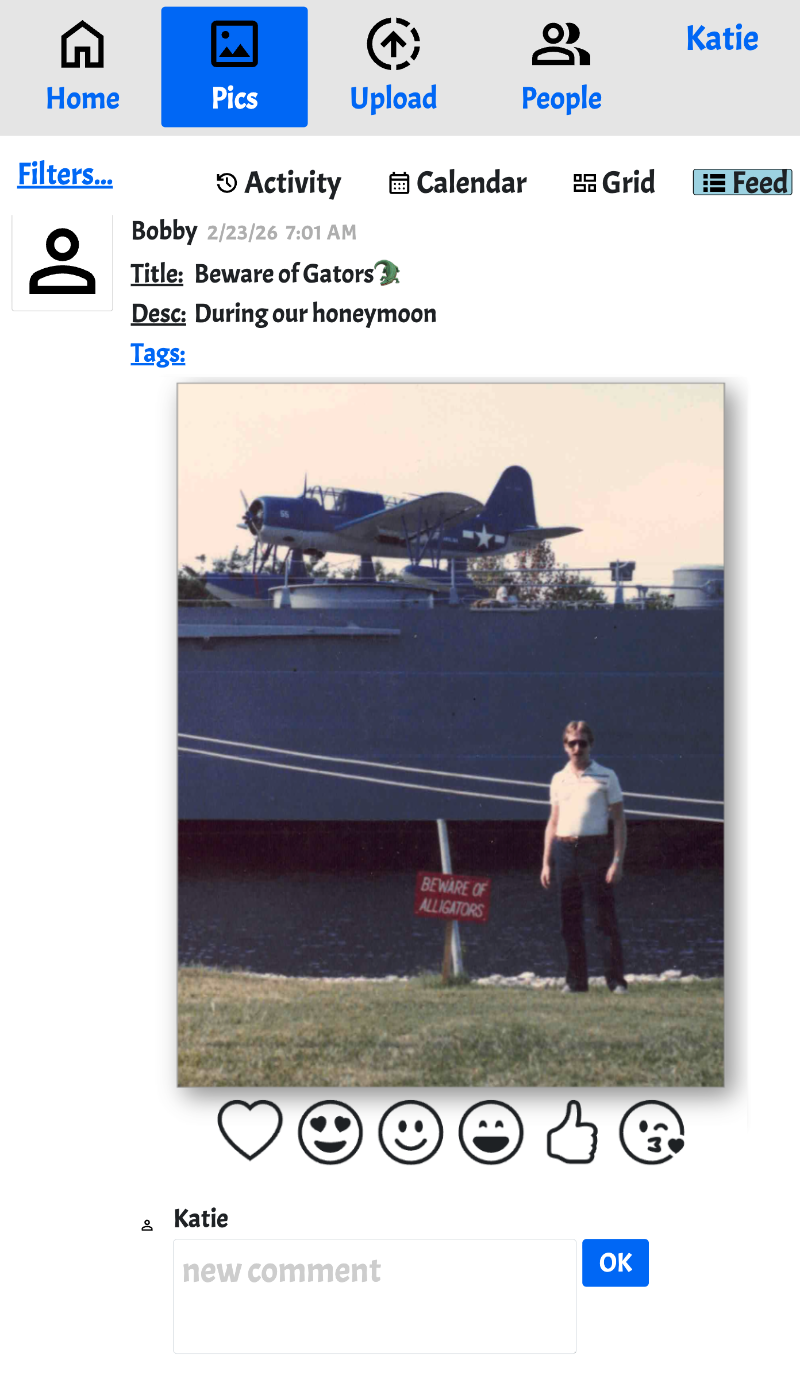 There is a lot going on here so lets take it one at a time. This is the feed view.
- From Katie's account we are viewing Bobby's photo titled "Beware of Gators 🐊". Katie can see this because Bobby permissioned her to see it. Bobby's name is above the title to indicate he uploaded it.
- Change the title or the description by clicking on that text. Note: There is an activity view (more later) that shows when that sort of change is made.
- The "Tags" link allows you to make or assign a tag to this media - more on that later.
- Clicking on the image itself will show a dialog that allows Katie to download this image. If you have uploaded the image there is also a button to delete the image in that dialog. If you have entered a Skylight email then there is also a button to send the image to your Skylight device in that dialog. Sending may take a little time if the image is large.
- Clicking on one of the emotion icons below the photo allows Katie express how she feels about this photo. Note there will be a count below each emotion icon indicating how many people feel the same. Also clicking on those numbers shows you exactly who has that feeling/emotion. When you have expressed an emotion is is highlighted.
- Below the photo is an area where Katie may add a comment to this photo. Add the text and click the "OK" button. Note: comments also have the ability to express emotions. Editing a comment is done by clicking on it after the comment is created.
- At the very bottom of the feed view is a button to retrieve more (older) images - Get More. This will retrieve an additional 2 weeks of media. Note that the initial feed view is about 1 month of media.
- NEW: There is a share icon to the top/right of your photo/video (if you uploaded it)
 . This allows you to share the media outside of your circle by copying the link provided and pasting it into an app of your choice (e.g. Messages). Note that the result of this type of sharing is a preview along with the title of your media that links to a single view of that media (only) on the OurFamilyCircle.com site. Visitors that aren't logged in can only see that media (not the comments, not the emotions). Visitors are also given a link where they may login to see the comments & emotions. . This allows you to share the media outside of your circle by copying the link provided and pasting it into an app of your choice (e.g. Messages). Note that the result of this type of sharing is a preview along with the title of your media that links to a single view of that media (only) on the OurFamilyCircle.com site. Visitors that aren't logged in can only see that media (not the comments, not the emotions). Visitors are also given a link where they may login to see the comments & emotions.
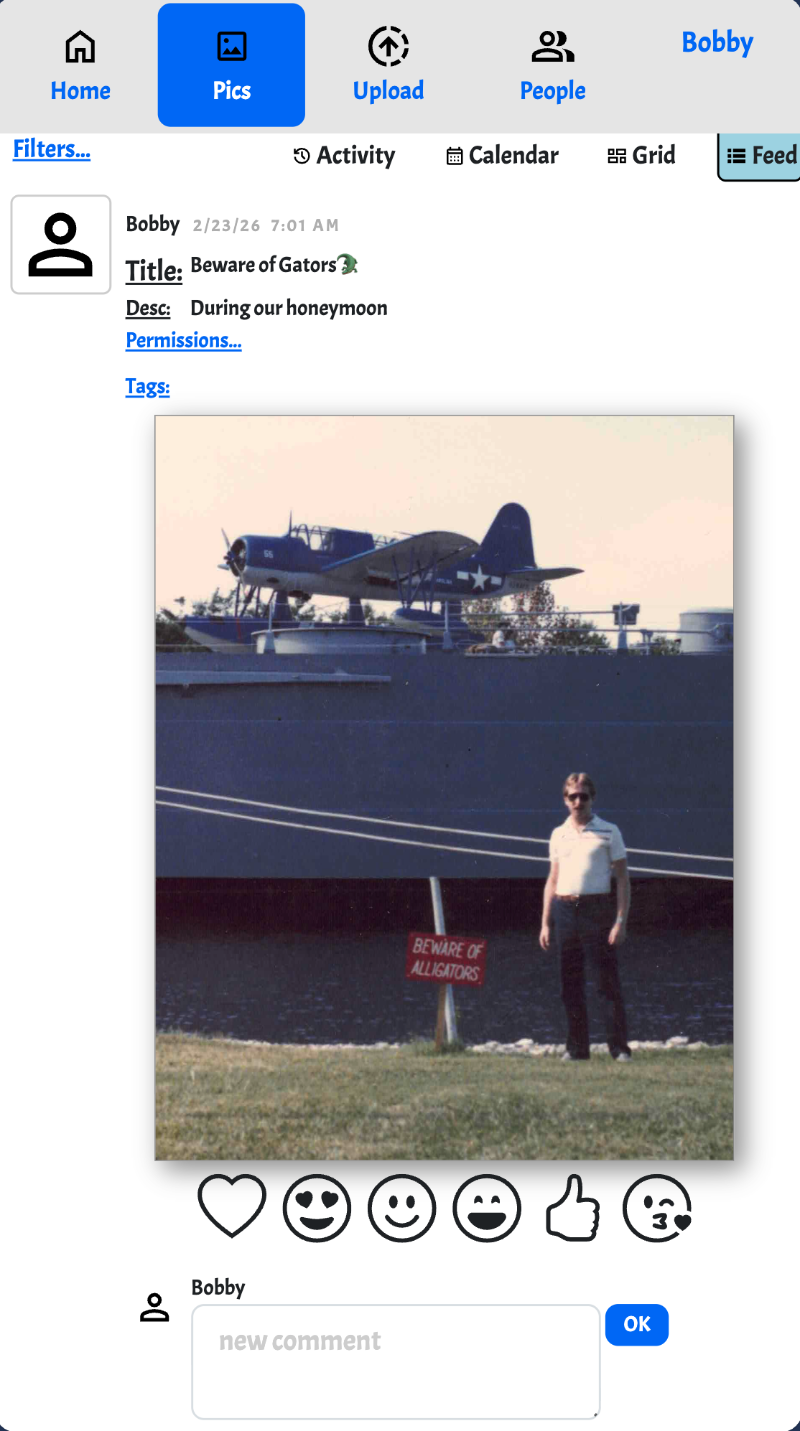
From Bobby's account this feed view looks a little different
- There is a "Permissions Link" that allows Bobby to update the permissions for this media
- Permission controls:
- Using these checkboxes Bobby can change the people that can view this photo. Note that if Bobby had chosen "Allow Sharing" then Katie would also be presented with a permissions control. Also note that Katie's Friends are likely different from Bobby's Friends so when each chooses to allow Friends to see this photo that likely includes different people. In other words, each person's permissions may be different when the are given the permission to share or if they are the person that uploaded the media.
- Use Case: If someone in your family wants to approve the images you upload prior to sharing them you can permission only them to view the photo and set the "Allow Sharing" permission too - this provides them with the ability to share the photo with their sharing permissions (if they want to). In this scenario they will see a "sharing icon" that can be clicked to basically take ownership of sharing the photo with their circle.
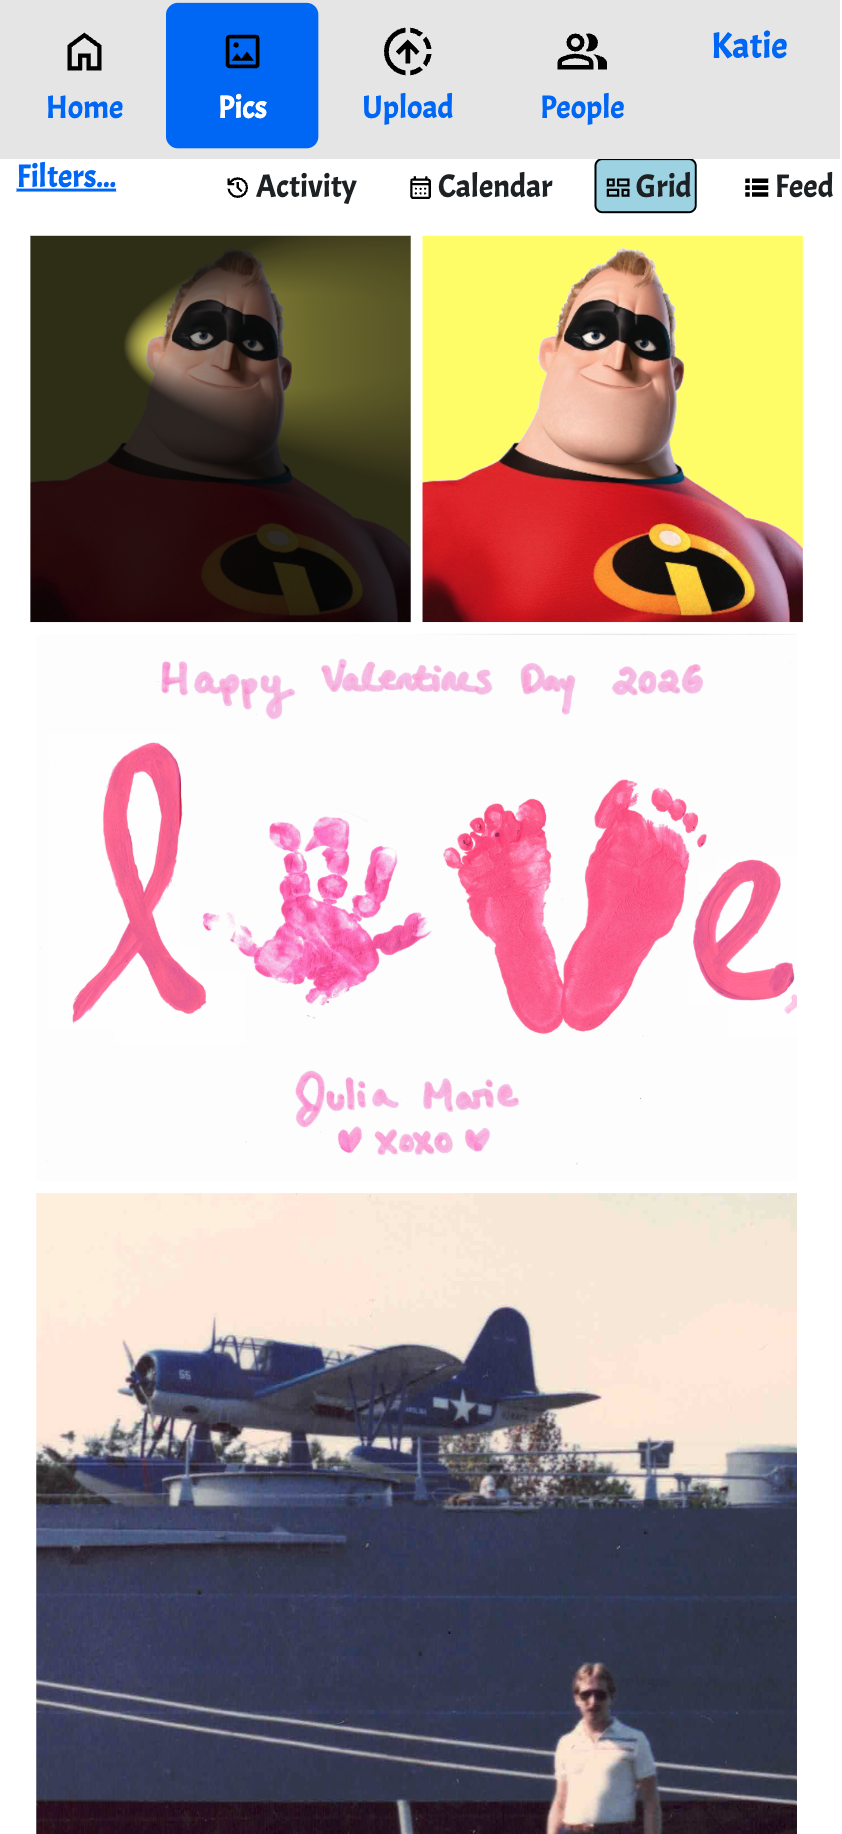
Grid View
Select the "Grid" option to arrange images in a nicely organized grid. The images are ordered from most recently uploaded to the oldest uploaded.
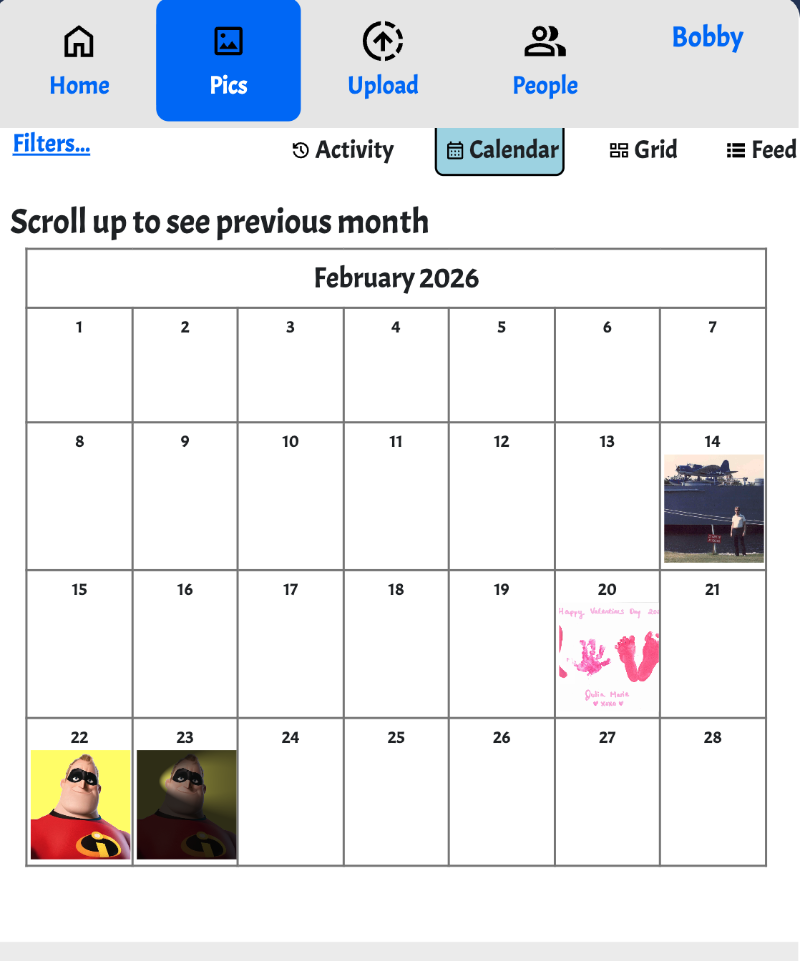
Calendar View
Select the "Calendar" option to arrange images based on the date the picture was taken.
- The date the picture was taken can be changed by clicking on the date & time (to the right of the author in feed view)
- When there are more than one photos taken on a specific day then the calendar view will update occasionally to show those other photos.
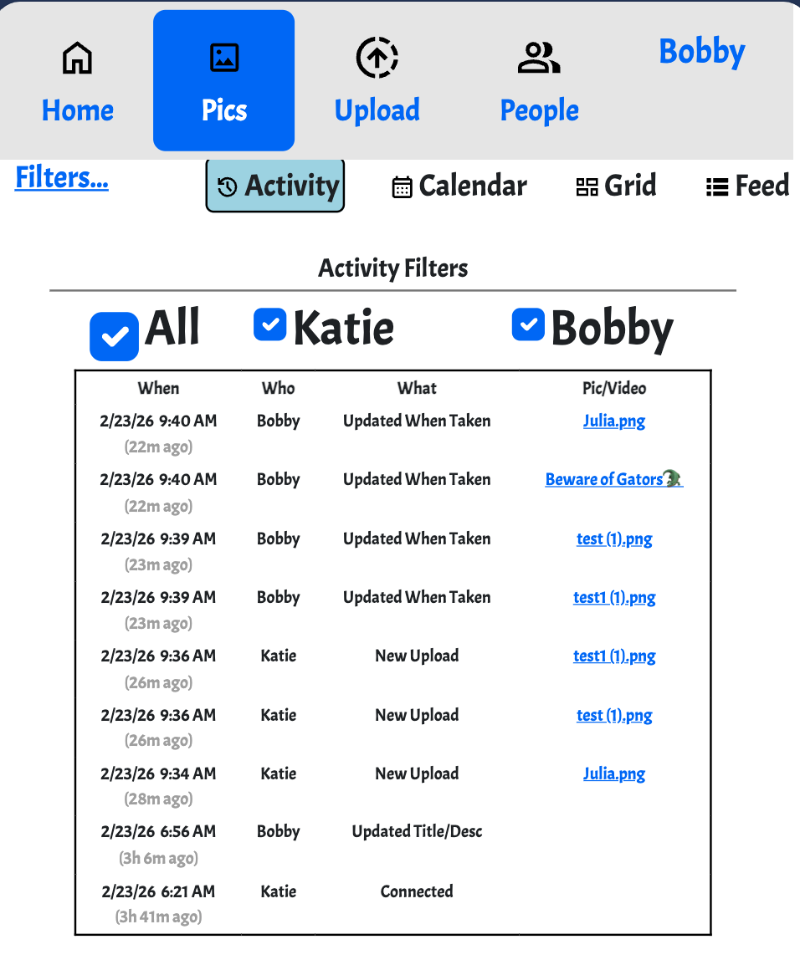
Activity View
Select the "Activity" option to arrange images based on the date the picture was taken.
- There are many activity types show - each has a "when", a "who" and a "what". The what is a link to the photo in the feed view.
- Above the list of activities are a number of checkboxes that allow the activity view to be filtered. Use "All" to toggle them all. These filters are reset when first viewing the activity view.
|
| Tags & Filters |
Tags are optional and used to easily find photos and filter your views ... More...
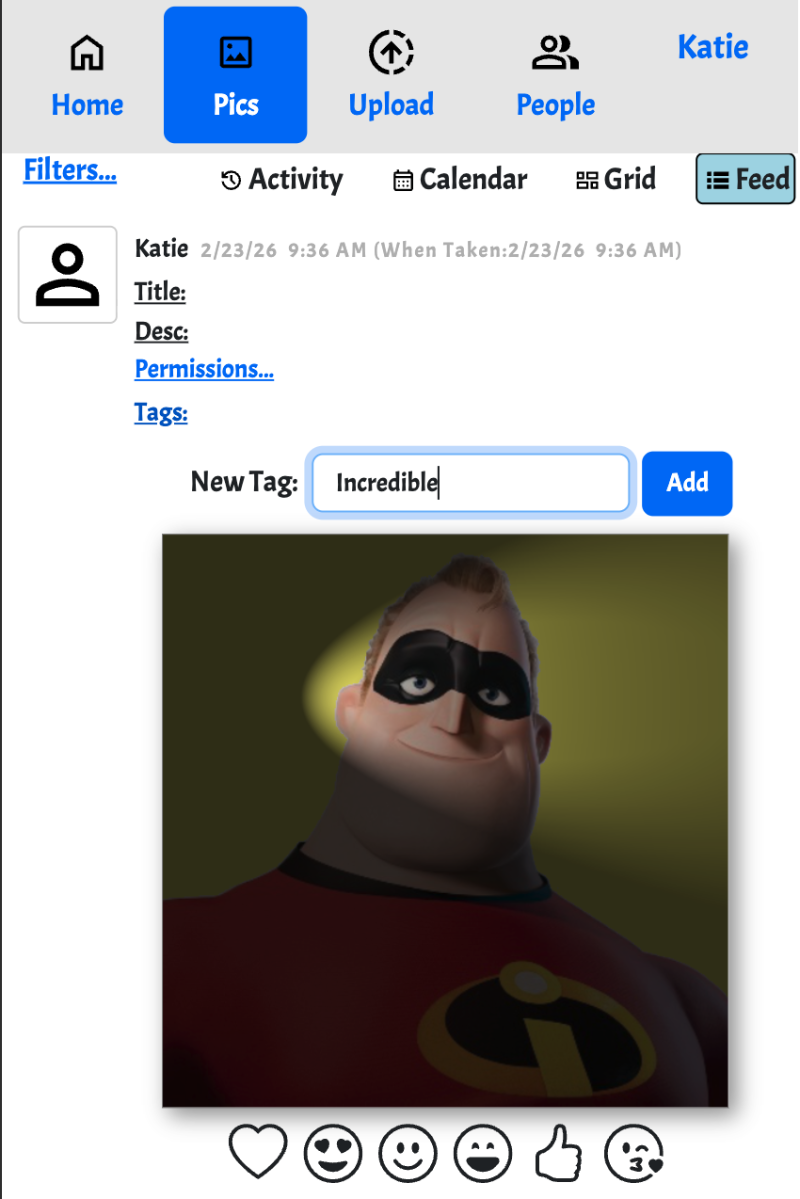
Creating a tag (feed view)
- To create a new tag click the "Tags" link and you'll see a text box to create a new filter.
- Simply click the "Add" button once your tag text is ready and you're done. That tag will be applied to your media
- Existing tags will be shown as checkboxes within the "Tags" block. As soon as they are clicked they are applied to your media
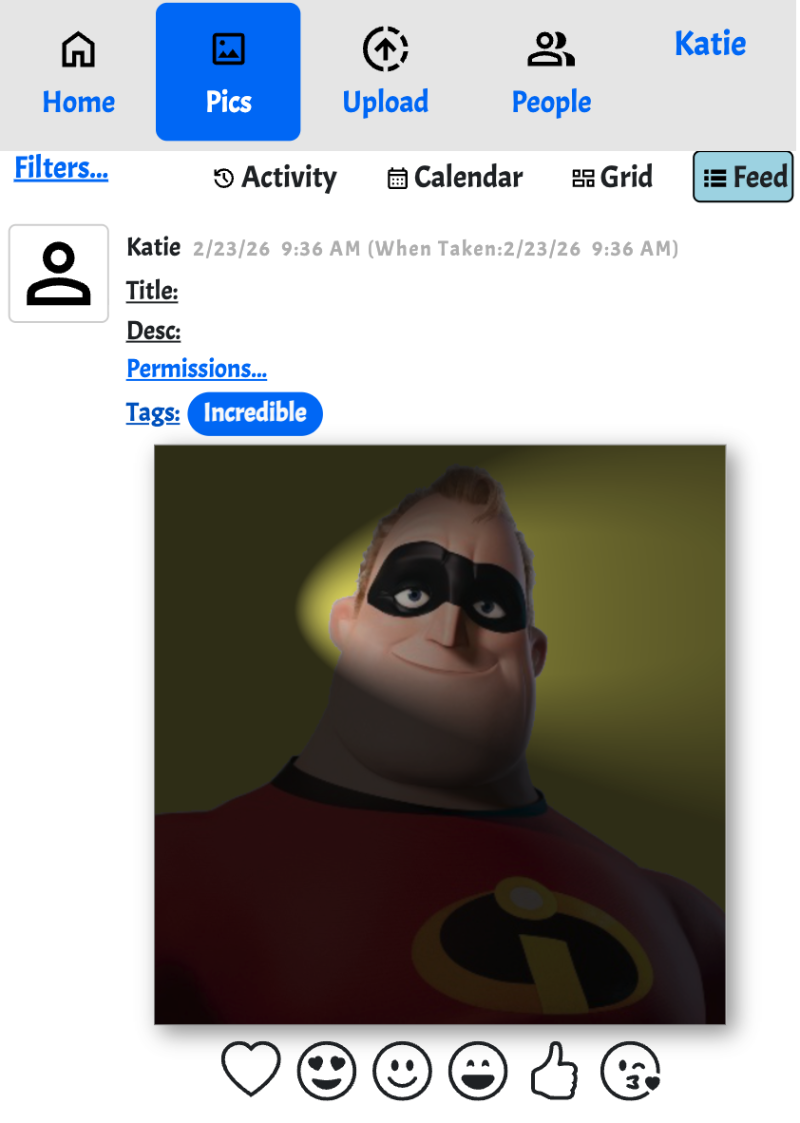 Showing existing Tags
- Tags already assigned to a photo or video are shown as pills beside the Tags link
- To remove a tag from a photo or video click the Tags link and uncheck the associated tag checkbox. As soon as it is clicked your tag is removed from that media.
- Note: The Edit Tags is available within your profile tab. This provides the ability to change the text of a tag or remove it entirely.
 Filtering views based on Tags ans Users
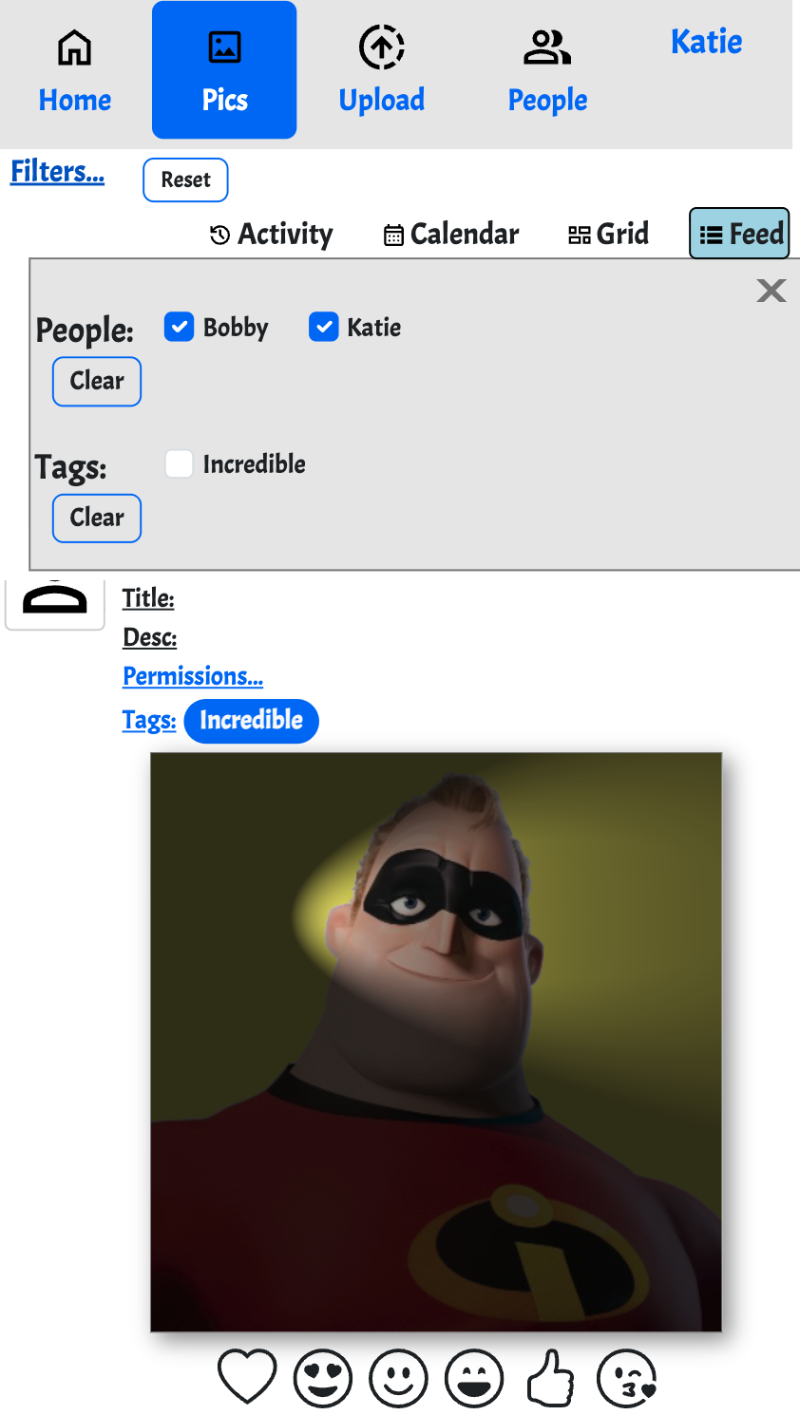
- Clicking on the "Filters" link, in the upper left corner of the Pics tab, reveals the available User and Tag Filters
- Initially all the "People" are on and all the tags are off. Note the list of users is based on the current list of images.
- Uncheck a person to remove their photos and videos from the view - this happens immediately. Same for when the filter transitions from off to on.
- Checking a Tag acts a little differently - for tags initially the none are selected indicating that nothing is filtered. By enabling a tag the filtering of images based on tags is also immediate.
As tags are added to the filter they act as an "AND" - in other words, if there are 2 Tags enabled in the filter then only the media with both those tags is shown.
- TIP: Filters apply to the feed view, the grid view, and the calendar view.
|